Remember when software-defined radio transmission required expensive hardware, complicated software, and a PhD to configure? Yeah, fuck that. I built PIrateRF to prove you can turn a $20 Raspberry Pi Zero W into a capable RF transmitter with a web interface that doesn’t make you want to punch your screen.
The Problem: SDR Transmission Shouldn’t Require a Fucking Manual
The amateur radio and SDR transmission world is full of amazing technology buried under layers of shitty UIs, command-line tools from the 90s, and documentation that assumes you already know what you’re doing. Want to transmit FT8? Here’s a 47-step guide. Want to broadcast FM? Better compile these 12 dependencies first. Want to test your antenna? Hope you like memorizing cryptic command arguments.
I got tired of this shit while experimenting with rpitx, F5OEO’s brilliant library that turns the Pi’s GPIO into an RF transmitter. The library itself is fantastic – it can generate everything from FM radio to digital modes using nothing but the Pi’s clock. But using it meant remembering dozens of command-line arguments, managing file conversions manually, and SSHing into the Pi for every fucking transmission.
The Solution: A Web Interface That Doesn’t Suck
PIrateRF wraps rpitx in a Go service that spawns its own WiFi access point and serves a web interface. Boot up the Pi, connect to its hotspot from any device (phone, laptop, tablet), open a browser, and you get a clean interface with all 11 transmission modes ready to go. Select your mode, configure your settings, upload your files if needed, and hit transmit. That’s it.
No SSH. No command-line arguments. No file format confusion. The interface handles everything – automatic audio/image conversion, real-time transmission status, live output logs via WebSocket, and proper error messages when shit goes wrong.
How It Actually Works
You flash PIrateRF to a Pi Zero W (the original Pi Zero 1 W – Pi Zero 2 W does NOT work) and boot it up. The Pi creates its own WiFi access point (default SSID: “🏴☠️📡”) and runs a web server at https://piraterf.local. Connect to the hotspot, open the URL in your browser, and you’re looking at the control panel.
Why Pi Zero 1 W only? The rpitx library uses the Pi’s clock generator to produce RF signals by manipulating GPIO timing at a hardware level. The Pi Zero 1 W has a BCM2835 chip with predictable clock behavior that rpitx relies on. The Pi Zero 2 W uses a BCM2710A1 with different clock architecture that breaks rpitx’s timing assumptions. Stick with the original Pi Zero 1 W.
The web interface is dead simple – a mode selector and a form that changes based on which mode you pick. Want to broadcast FM? You get fields for frequency, audio file upload, RDS settings (station name, scrolling text), playlist builder, and intro/outro jingles. Want to send Morse code? You get frequency and message fields. Each mode shows exactly what it needs, nothing more.
When you hit transmit, the browser sends your configuration to the Go backend via WebSocket. The backend validates everything, handles file conversions (FFmpeg for audio, ImageMagick for images), pipes the data to the appropriate rpitx module, and streams live output back to your browser. You see exactly what’s happening in real-time – transmission progress, rpitx output, any errors that occur.
Only one transmission can run at a time (because GPIO doesn’t share), but here’s the cool part: multiple people can connect simultaneously. While one person is transmitting, everyone else sees the live status, output logs, and transmission progress. When it finishes, anyone can jump in and queue the next transmission. Perfect for collaborative RF chaos with friends.
The Transmission Modes: What You Can Actually Do
🎵 FM Station – Full Broadcast Radio
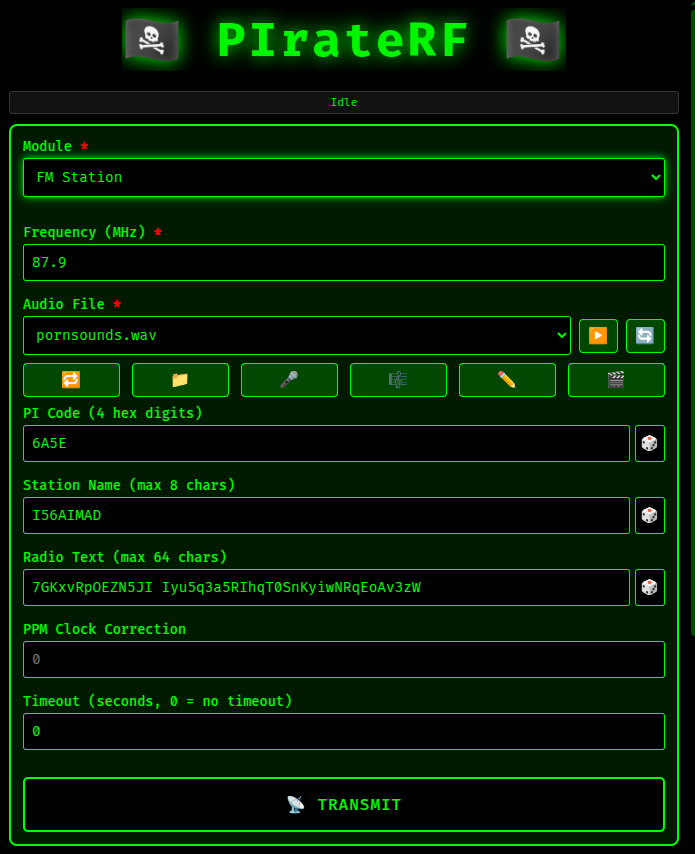
This isn’t some basic FM transmitter. PIrateRF gives you a complete FM broadcasting station with RDS support. Upload MP3/WAV/FLAC/OGG files and they automatically convert to the proper format. The playlist builder lets you combine multiple tracks with SFX (intro jingles, station IDs, outro music) into a single broadcast.
RDS configuration lets you set your station’s PI code (identifier), PS name (8-character station name that shows on car radios), and radio text (64-character scrolling message). You can set it to play once or loop continuously, with configurable timeout and clock correction for frequency accuracy.
The browser also includes a microphone recorder – capture audio directly through the interface and save it as WAV for later use.
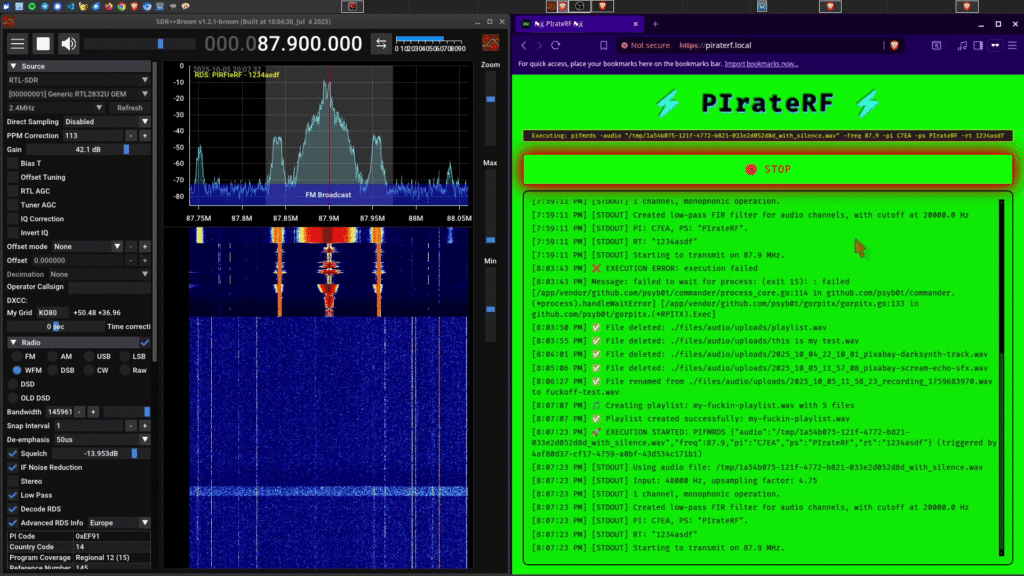
When you tune into the transmission with an SDR receiver, you see three signals: the main carrier with your audio, and two parallel RDS subcarriers containing your station metadata. SDR++ (the sdrpp-brown fork) has built-in RDS decoding, so you can verify your station name and text are transmitting properly.
🎙️ Live Microphone – Real-Time Broadcasting
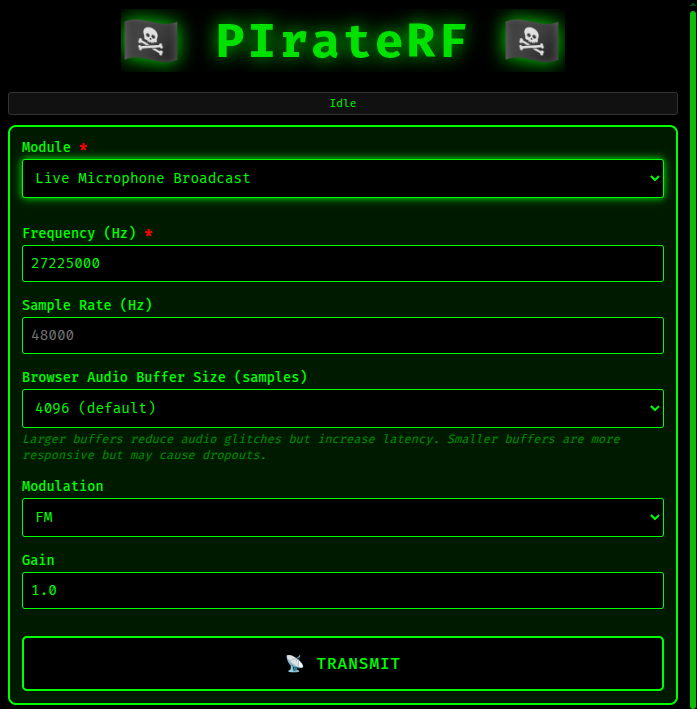
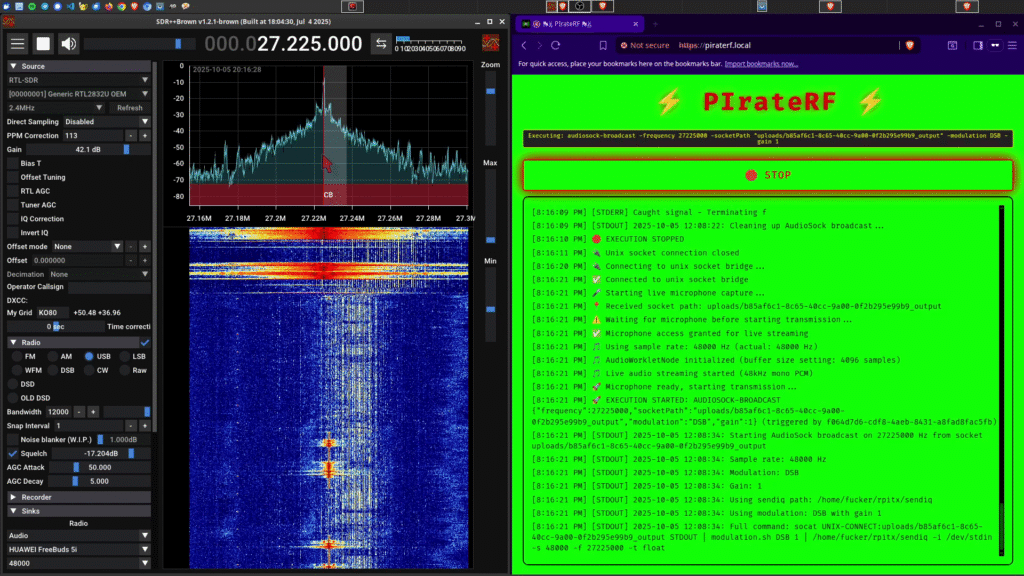
This mode streams your microphone directly to RF in real-time. The browser captures audio, sends it via WebSocket to the Pi, and pipes it straight into rpitx for transmission. You can configure modulation type (AM/DSB/USB/LSB/FM/RAW), sample rate, buffer size (trading latency for quality), and gain.
Perfect for live commentary, emergency communications, amateur radio nets, or broadcasting your burps live on the airwaves.
📟 FT8 – Weak Signal Digital DX
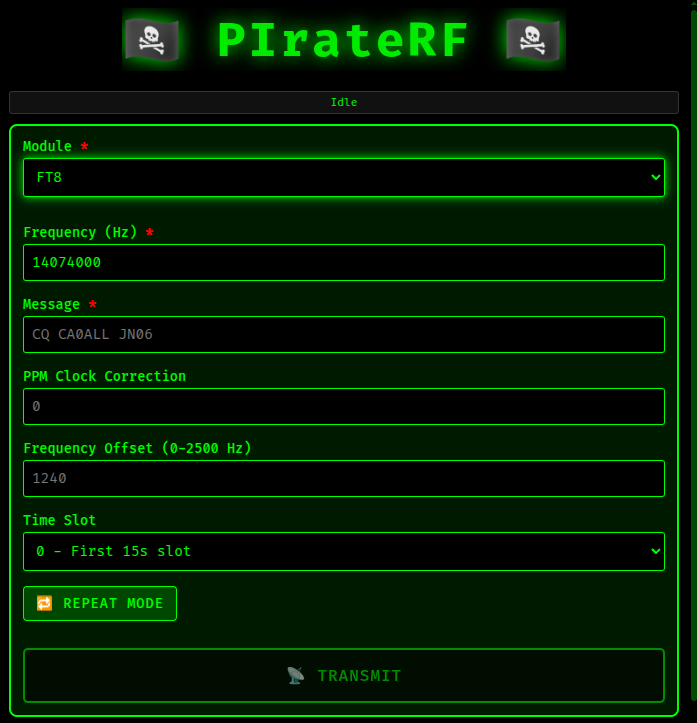
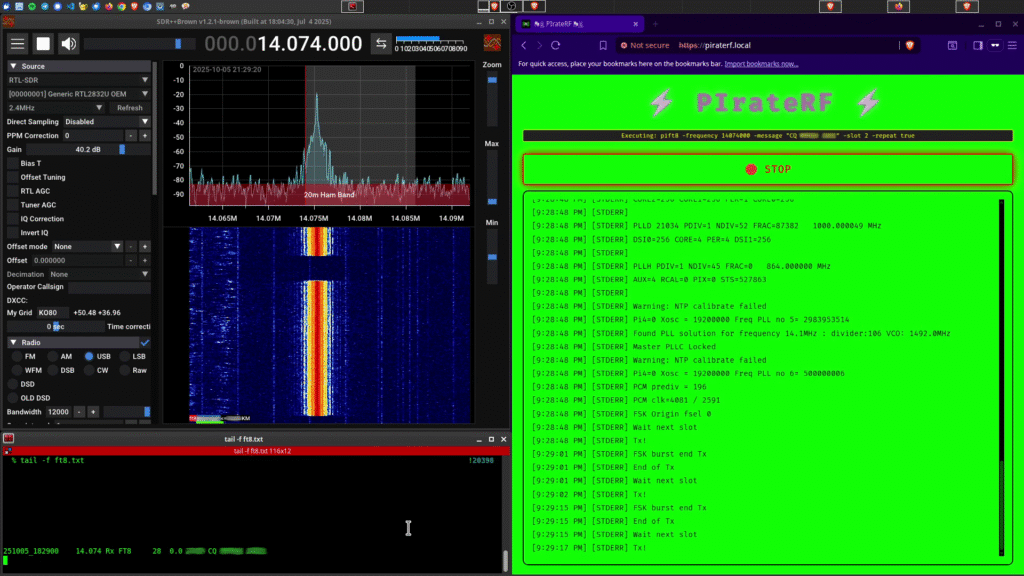
FT8 is the weak-signal digital mode that hams use for long-distance HF contacts when conditions are marginal. You configure your message (like “CQ CA0ALL JN06”), set your frequency (e.g., 14.074 MHz for 20 meters), choose your frequency offset within the FT8 sub-band, select a time slot, and optionally enable repeat mode for continuous transmission every 15 seconds.
Reception is straightforward – tune your SDR to USB mode on the FT8 frequency, and SDR++ has a built-in FT8 decoder that shows all the stations.
Warning: FT8 messages contain call signs. Transmitting without a license is direct call sign spoofing and highly illegal. Don’t be that idiot.
📠 RTTY – Radio Teletype
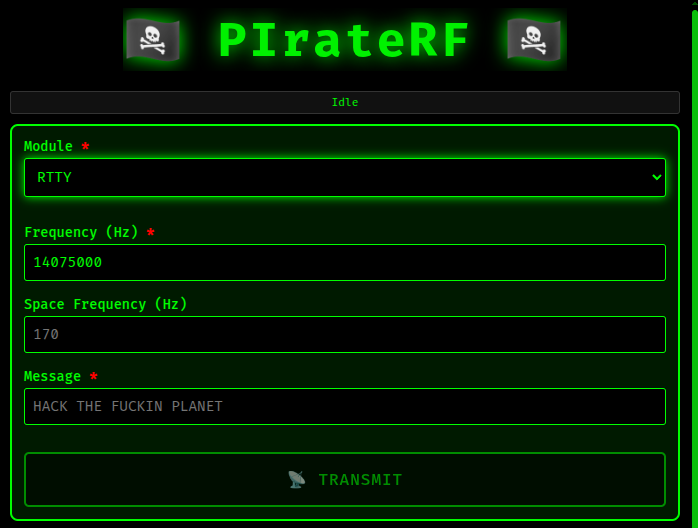
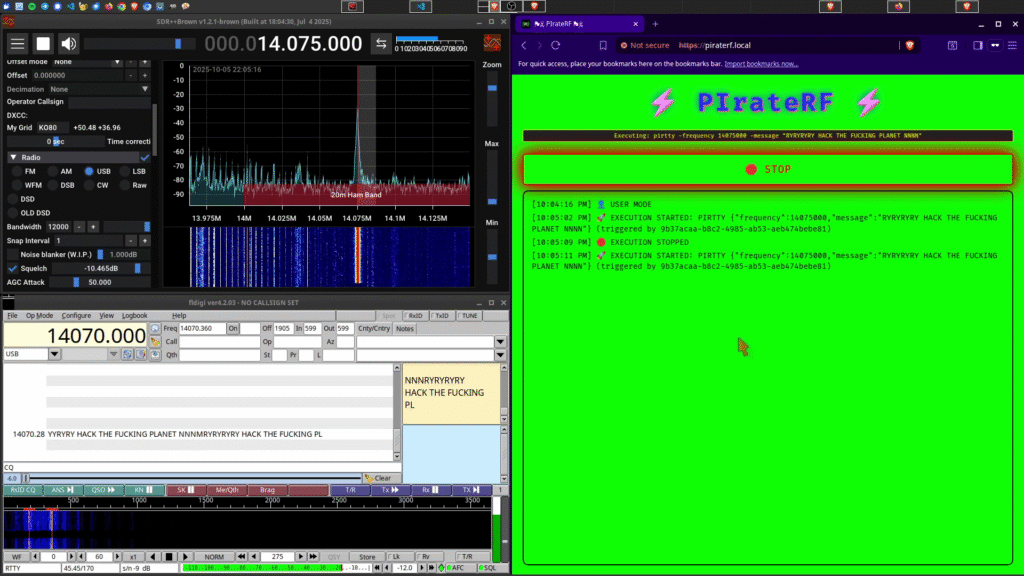
Classic digital text transmission using FSK modulation and Baudot code. Set your frequency, configure the space frequency offset (default 170 Hz), type your message, and transmit. Receiving requires USB demodulation and fldigi configured for RTTY mode with the matching shift setting.
Great for sending ASCII art over the air, because why the fuck not.
📊 FSK – Frequency Shift Keying Data
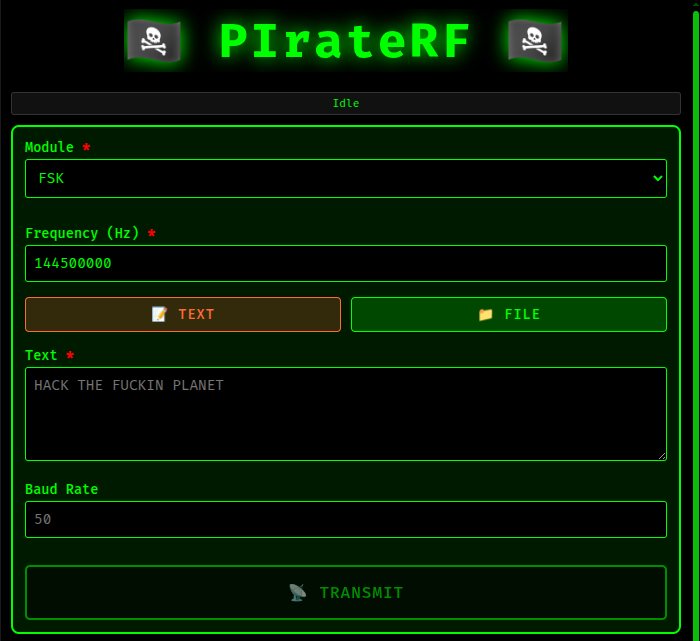
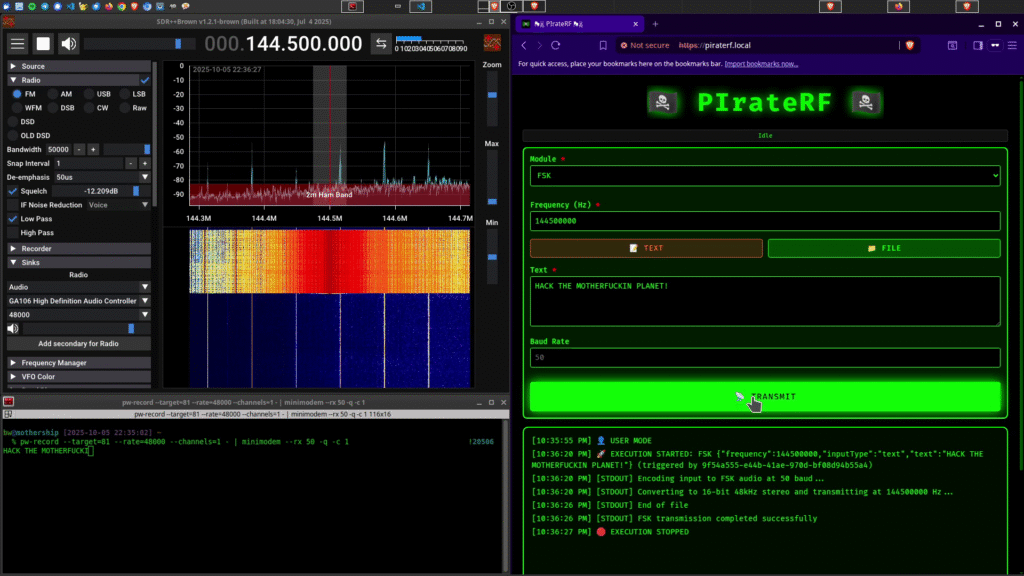
Binary frequency shift keying for data transmission. You can send text directly or upload data files (any format – they’re sent as-is). Configure your frequency and baud rate (50-100 baud works best based on testing), and PIrateRF handles the rest.
Reception uses FM demodulation piped into minimodem:
pw-record --target=81 --rate=48000 --channels=1 - | minimodem --rx 50 -q -c 1
The pw-record command captures audio from your SDR software’s PulseAudio monitor sink, so whatever you’re listening to in SDR++ or GQRX pipes directly into the decoder.
📱 POCSAG – Digital Pager Messaging
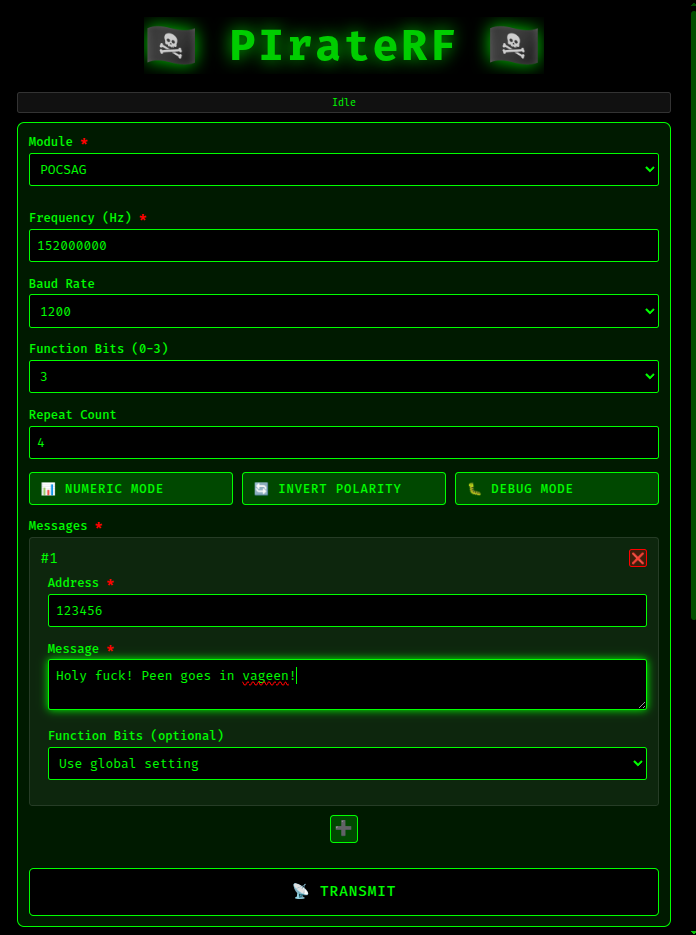
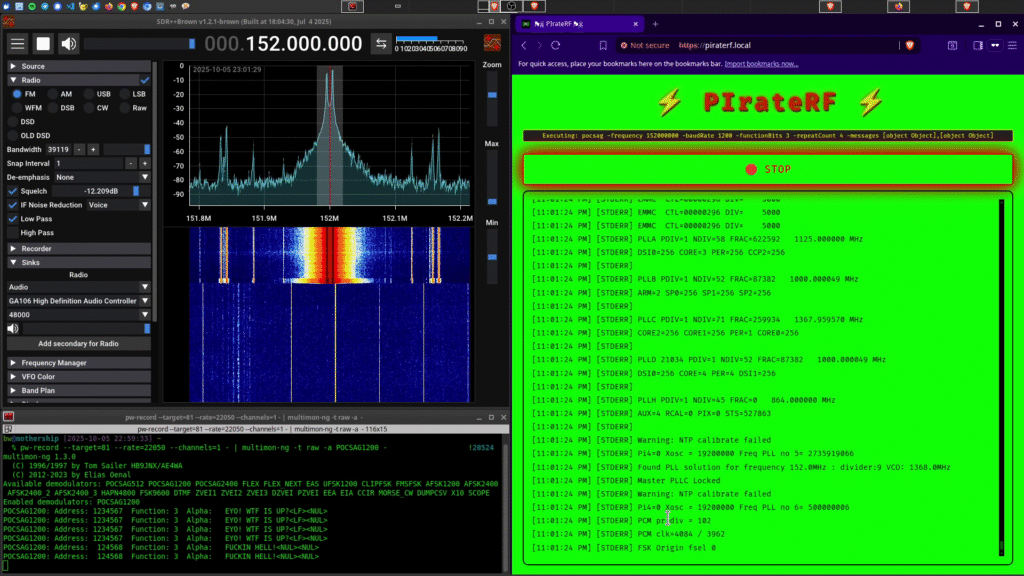
Remember pagers from the 90s? PIrateRF brings that nostalgia back. POCSAG supports multiple messages, each with its own pager address and text. You configure baud rate (512/1200/2400), function bits (0 for numeric, 3 for alphanumeric, 1-2 for ring-only), repeat count, and optional features like numeric mode, polarity inversion, and debug output.
Each message can override the global function bits, allowing different message types in a single transmission.
Decode with multimon-ng:
pw-record --target=81 --rate=22050 --channels=1 - | multimon-ng -t raw -a POCSAG1200 -
Change the multimon-ng mode (POCSAG512, POCSAG1200, POCSAG2400) to match your configured baud rate.
📻 Morse Code – CW Transmission
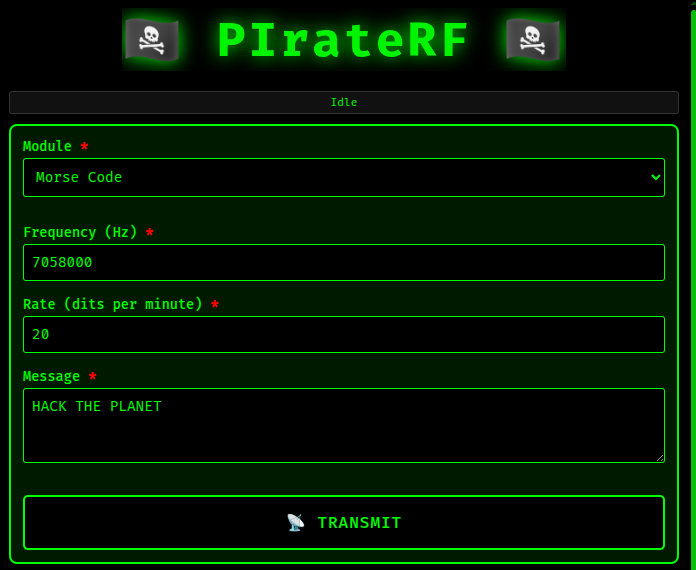
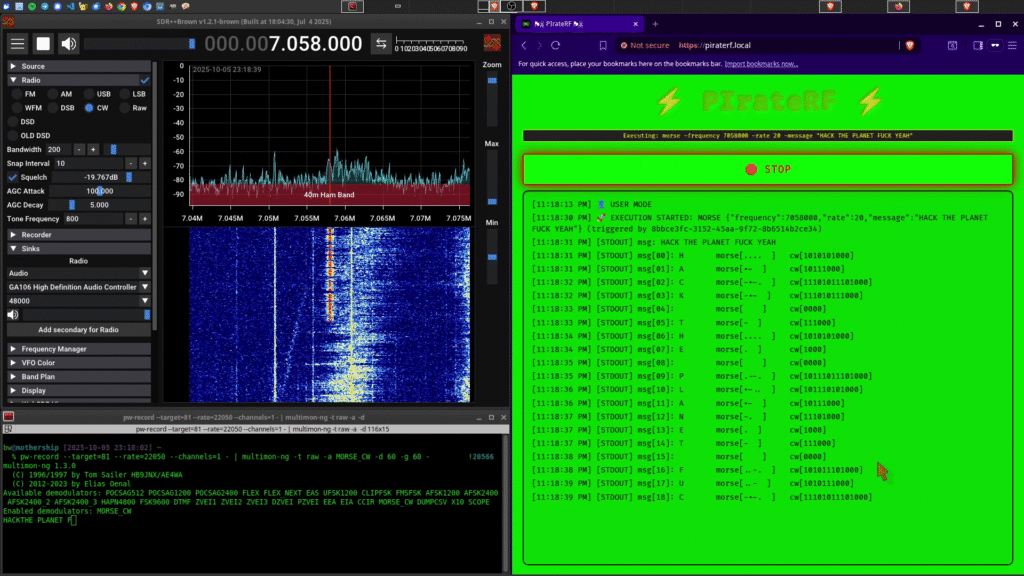
Simple Morse code transmission with configurable speed (dits per minute). Type your message, set your frequency and rate, and transmit. Perfect for practice, beacon transmissions, or sending dirty messages in CW.
Decode with CW demodulation and multimon-ng:
pw-record --target=81 --rate=22050 --channels=1 - | multimon-ng -t raw -a MORSE_CW -d 60 -g 60 -
The -d (delay) and -g (gain) parameters need adjustment based on your transmission rate – higher speeds need lower delay values.
🎛️ Carrier Wave – Simple Testing
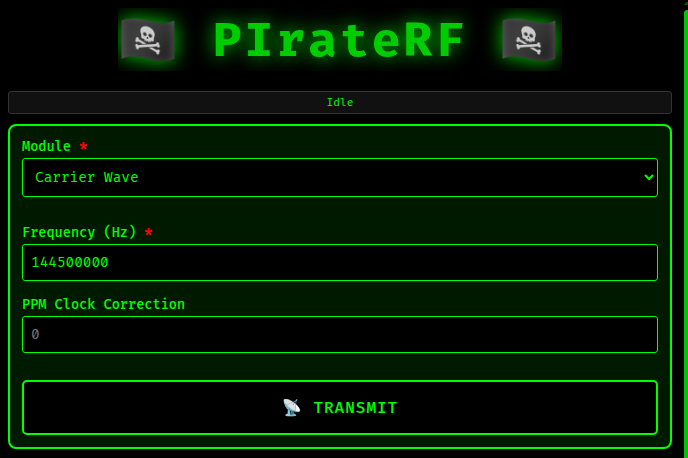
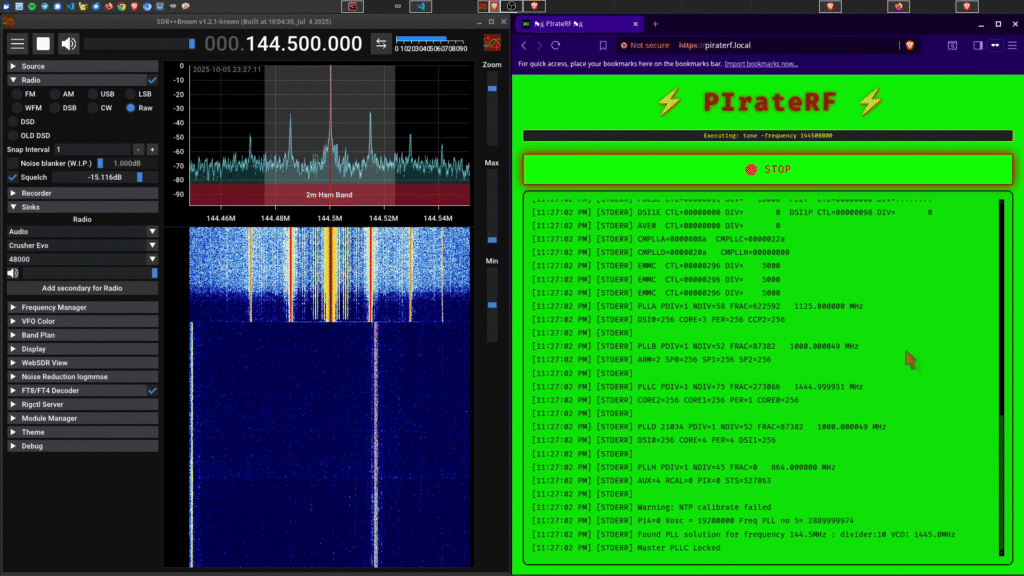
Generate a continuous wave at a specific frequency with optional clock correction. Dead simple – just a carrier for antenna tuning, SWR measurements, or trolling with dead carriers.
Receive in RAW mode on your SDR.
🌊 Frequency Sweep – Antenna Analysis
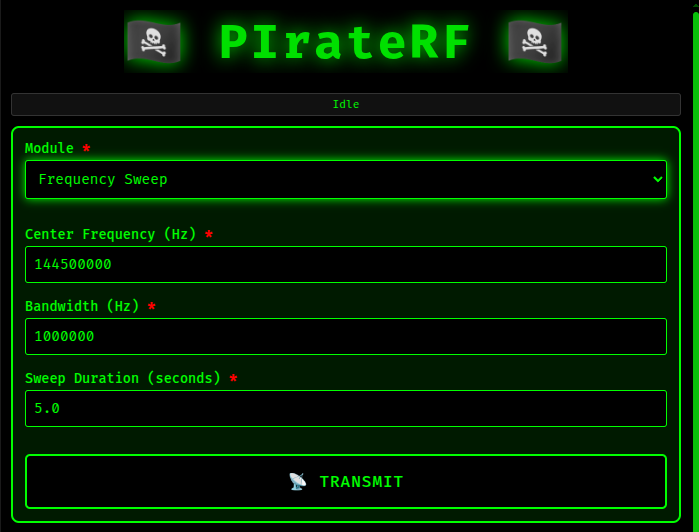
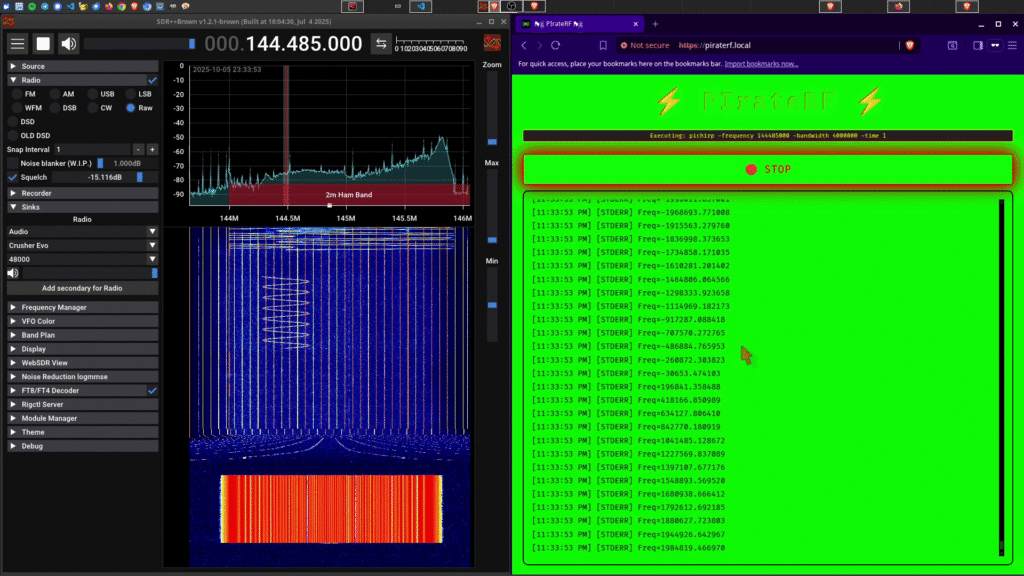
Automated frequency sweeps for antenna and filter testing. Configure center frequency, bandwidth (default 1 MHz), and sweep duration (default 5 seconds). PIrateRF continuously sweeps across the specified range.
Watch in RAW mode as the active carrier frequency sweeps left to right across your waterfall display.
📺 SSTV – Slow Scan Television
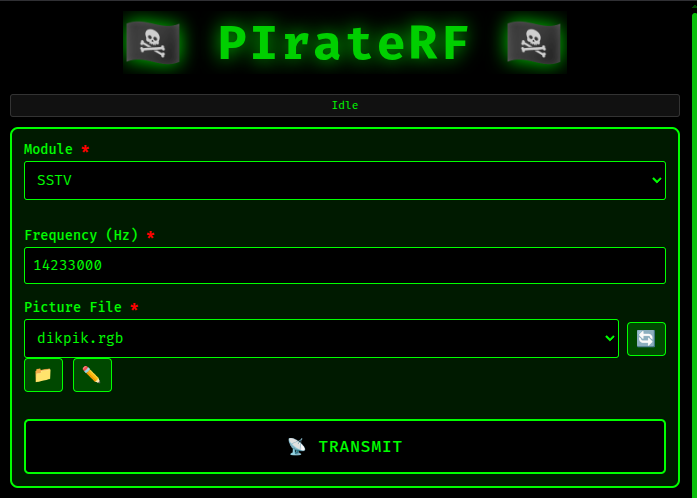
Upload images for SSTV transmission using Martin 1 mode. PIrateRF converts uploaded images (JPEG/PNG/GIF) to the proper RGB 320×256 format automatically.
Full disclosure: I’ve tried decoding this with QSSTV and haven’t successfully received images yet. The rpitx SSTV module is trusted to generate proper Martin 1 signals, but I can’t personally confirm it works. If you successfully decode SSTV from PIrateRF, please open a PR with your setup details.
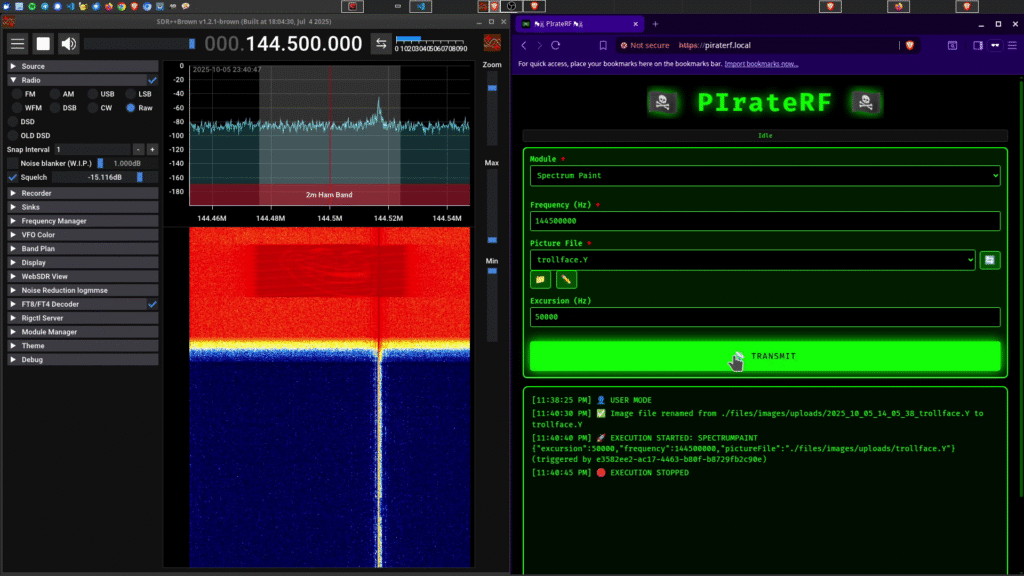
🎨 Spectrum Paint – Waterfall Art
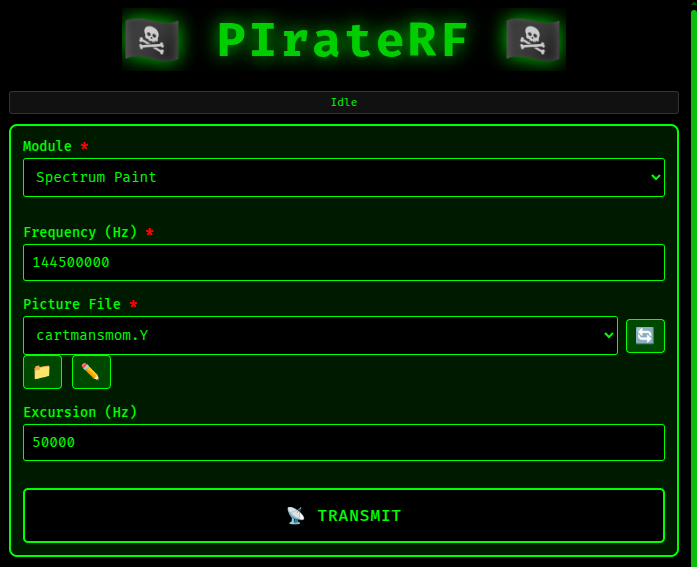
Turn images into RF spectrum art. Upload an image and PIrateRF converts it to YUV format for spectrum painting (also generates RGB format for SSTV compatibility). Configure your base frequency and excursion (frequency deviation, default 100 kHz).
Receive in RAW mode with your waterfall display set to full resolution (no filtering, show all spectrum peaks). The image appears painted across the spectrum.
The Cool Features Nobody Else Bothers With
Automatic File Conversion
Upload an MP3 for FM broadcasting? PIrateRF converts it to 48kHz/16-bit/mono WAV using FFmpeg. Upload a JPEG for SSTV? ImageMagick converts it to RGB 320×256. Upload a PNG for spectrum paint? Converted to YUV automatically.
You never see the intermediate files or worry about format specifications. Just upload and transmit.
Playlist Builder
The FM mode includes a playlist builder UI – select multiple audio files and SFX, arrange them in order, and PIrateRF uses Sox to concatenate them into a single WAV file. Add intro jingles, station IDs, multiple tracks, and outro music, all through the web interface.
Real-Time WebSocket Status
Every transmission streams live output via WebSocket. You see rpitx’s actual output as it happens – transmission progress, frequency information, any errors or warnings. When something breaks, you know immediately with actual error messages instead of silent failures.
Pirate Crew Mode
Connect multiple devices to the PIrateRF access point and everyone sees the same interface. While only one transmission runs at a time (GPIO physics), all connected devices see real-time status updates, live transmission logs, and can take turns controlling the transmitter.
Perfect for collaborative RF experimentation, or just fucking around with friends in a radio wave gangbang.
Browser Microphone Recording
The FM mode includes a built-in audio recorder – click record, speak into your device’s microphone, and save it as WAV for transmission. No need to leave the browser or use external recording tools.
WebSocket to Unix Socket Bridge
The live microphone mode uses a WebSocket-to-Unix-socket bridge that pipes browser audio directly into rpitx in real-time. Your browser captures microphone data, streams it via WebSocket to the Pi, the Go backend writes it to a Unix socket, and rpitx reads from that socket for immediate transmission. No temporary files, no buffering delays – just live audio from browser to RF.
Indoor Testing: Safe Chaos Without External Antennas
The Pi Zero outputs a few milliwatts through GPIO pin 4. Without an antenna, the signal barely reaches across a room – maximum range about 5 meters indoors. Perfect for safe experimentation without pissing off neighbors or regulatory authorities.
All my testing and demos were done indoors with no antenna at these power levels. You can test encoding, verify decoders work, experiment with different modes, and learn RF concepts without any external transmission.
Want more range? Add a proper resonant antenna and low-pass filter for your frequency. Want serious range? Add an amplifier. But here’s the critical shit: the Pi outputs square waves with harmonics across the entire spectrum. Without low-pass filtering, you’re broadcasting on every harmonic simultaneously.
At milliwatt levels indoors, this is harmless experimentation. With an amplifier and no filter, you become that asshole jamming multiple amateur bands at once. Use proper filtering or stay indoors.
Getting Started: Two Options
Option 1: Pre-Built Image (Recommended)
- Download the image: PIrateRF v2025-10-06
- Flash to SD card using Raspberry Pi Imager or
dd - Boot the Pi Zero W
- Connect to WiFi SSID “🏴☠️📡” (password: “FUCKER!!!”)
- Open browser to
https://piraterf.local - Start transmitting
Default SSH access: user fucker, password FUCKER, hostname piraterf.local
Option 2: Build From Source
The GitHub repo includes full automation via Make commands:
make pi: Complete automated setup (installs rpitx, configures WiFi AP, builds, deploys, installs systemd service, reboots)make pi-image: Clone and shrink your SD card for distribution
You need a Linux box for cross-compilation. The build system handles everything – dependency management, ARM compilation, Pi deployment, service installation.
Check the README for detailed manual setup instructions if you want to understand every step.
The Legal Shit
PIrateRF is designed for amateur radio experimentation and education – including safe indoor testing without external antennas. Built for engineers who understand that good RF practices matter more than arbitrary administrative boundaries. Users are responsible for compliance with all local RF regulations and licensing requirements.
I am not responsible for any of your stupid fuckin’ decisions!
Most transmission modes require an amateur radio license:
- FT8, RTTY, FSK, SSTV, Morse, POCSAG on amateur bands all need proper licensing
- Indoor testing at milliwatt levels without antennas is safe experimentation
- Adding amplifiers and outdoor antennas means you better have your license and proper low-pass filtering
- FT8 transmissions contain call signs – broadcasting without a license is direct call sign spoofing
The Pi Zero outputs only a few milliwatts. If you use an amplifier, respect your license class power limits and use proper filtering.
What’s Next
Current TODO list:
- Fix RTTY carrier timing (needs +1 second)
- Replace minimodem in FSK with something less janky
- Fix Morse code word spacing
- Actually prove SSTV works
- Add UI help overlays: mode info buttons explaining what each transmission mode does + per-input tooltips explaining what each configuration option changes
- Add RAW SendIQ module: upload .iq capture files and replay them (useful for repeater captures, signal replays, etc.)
The code is WTFPL licensed. Clone it, fork it, modify it, break it. Just don’t blame me when the FCC shows up because you decided to run 100 watts through a coat hanger without a low-pass filter.
Get It
Now get out there and start broadcasting like the RF pirate you were meant to be! 📡🏴☠️